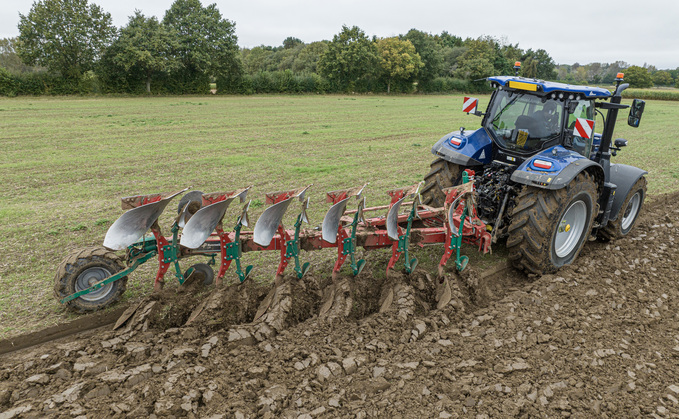
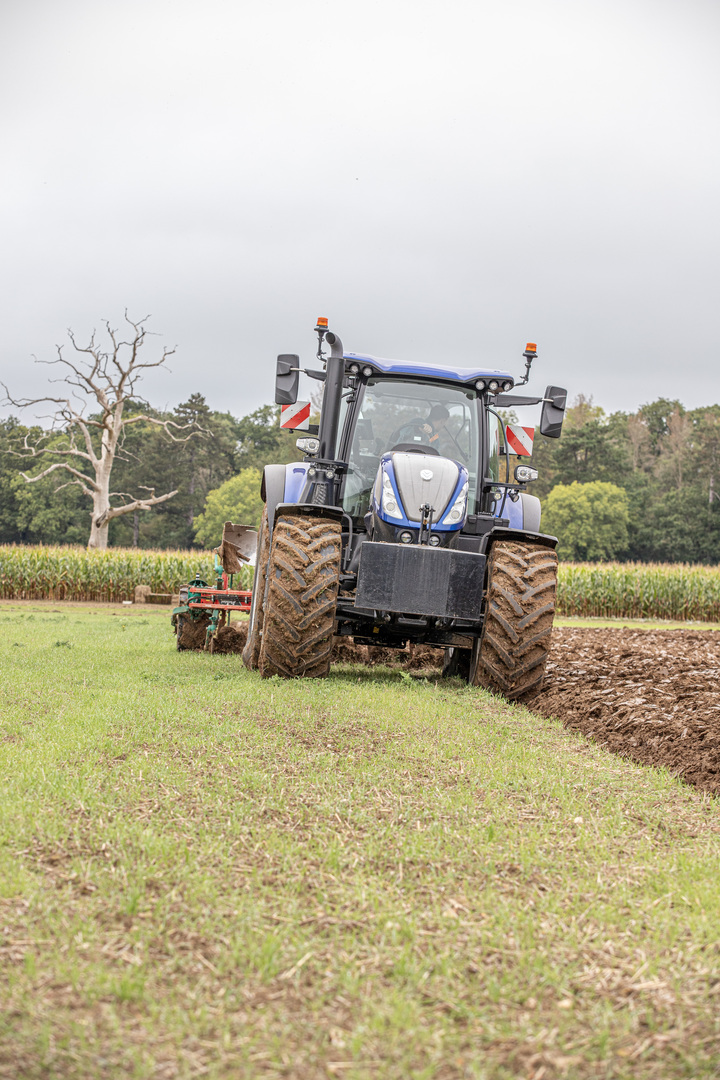
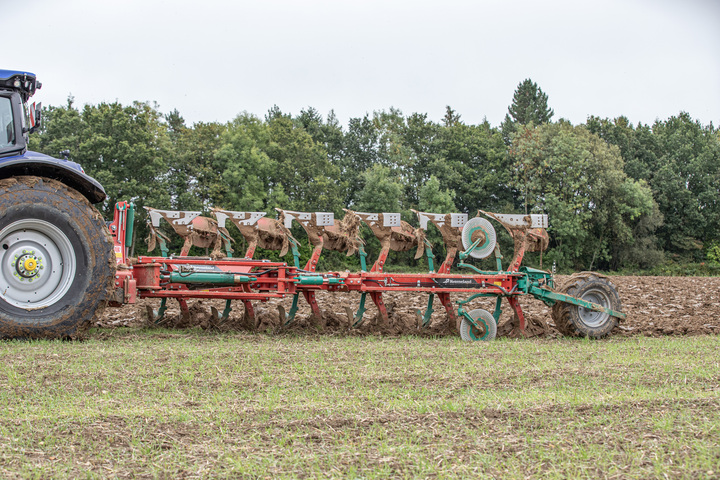
Good ploughing is much more than just ‘blacking it over.' When correctly set, surface trash will be completely buried and furrows will match perfectly on adjacent runs to leave a level finish on which to carry out subsequent cultivations.
But where should you start? To achieve good ploughing, it is essential that both the tractor and plough are properly prepared, before you head to the field according to Kverneland's Adam Burt.
"There is a number of mechanical factors that can influence the quality of ploughing," says Adam. "With a reversible plough, if the tractor's rear linkage is not set correctly before you hitch-up, this can have an impact on how the left- and right-hand bodies match up - particularly when running in-furrow."
"Operating with a wide tyre in-furrow can also make it harder to match the front furrow with the last furrow of the previous run," he adds. "In such circumstances, you may be better off running on-land, and if possible, use GPS to guide the tractor to suit your total working width."
Setting GPS though, will only keep the tractor straight while running on top of the land - the plough will still need to be set correctly to make it easy to pull while burying trash and leaving behind a high-quality, level finish.
"There is an extensive range of adjustment that also lets you fine-tune most aspects of the plough to tailor the quality of work to individual soil types," says Adam.
He says that understanding the tractor's hydraulics and linkage control is just as important as understanding the plough, to use the correct value for draft control, lift height, turn-over speed and rate of drop - the latter with heavier mounted ploughs.
"One setting does not suit all circumstances, and there are times when you may need to make very specific, but small adjustments to both the tractor and plough, to improve the quality of work," he says.
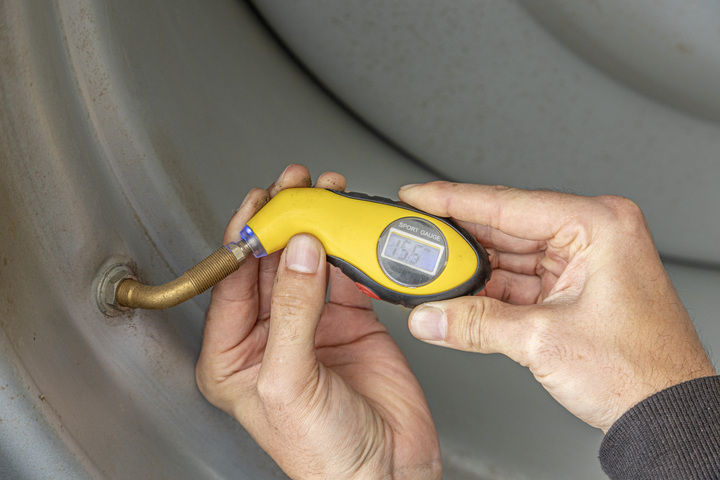
Tractor tyre pressures
When using a reversible plough, tyre pressures must be equal on the same axle. A softer tyre will cause the tractor to sit lower on one side, when in-furrow, and this can cause the plough to work slightly deeper and also lean over more on one side, than the other.
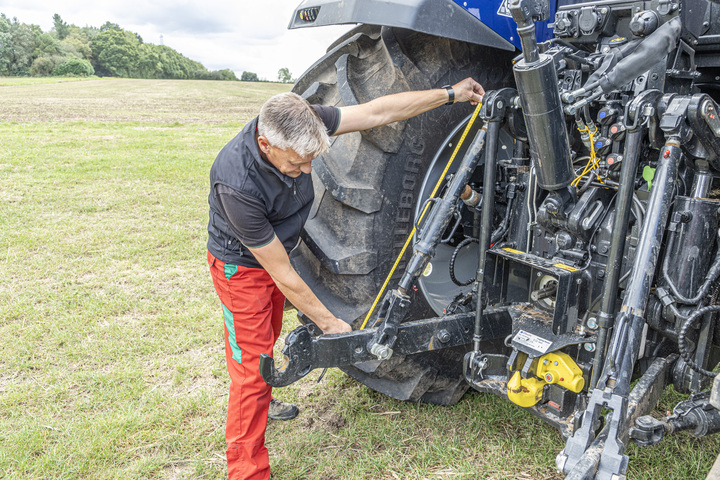
Link arms
Like tyre pressures, lift arms - or drop links - should be the same length. Use a tape measure to check that the distance between pin centres is exactly the same on both arms. Adjust them accordingly - do not use the slotted ‘float' settings.
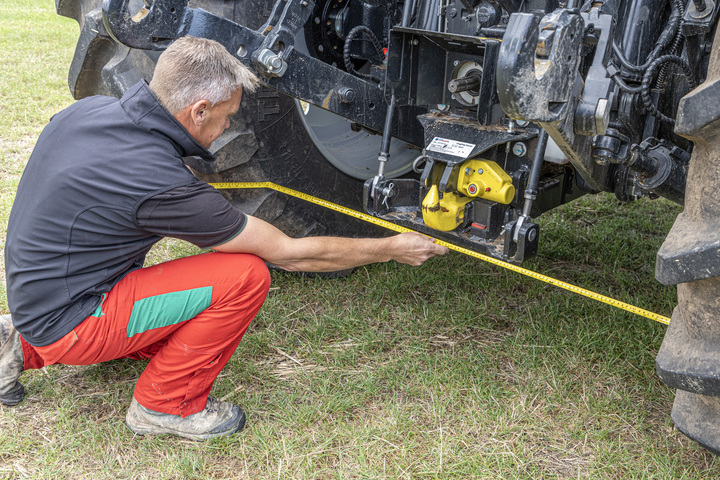
Rear wheel track settings
Check that the wheel track settings are within the working range of the plough. Kverneland ploughs operate with a tolerance of 1.1m to 1.6 m measured between the inside of the rear tyres, to span a furrow width range of 12-20in when working in-furrow. For on-land use, overall tractor width measured outside-to-outside should be less than three metres to keep the edge of the tyre away from the edge of the furrow.
Front-wheel track
The front wheel track should be set around 100mm wider than the rear, when measured between the inside of the front tyres, to keep the front tyre away from the edge of the furrow wall. This affords a small amount of steering correction.
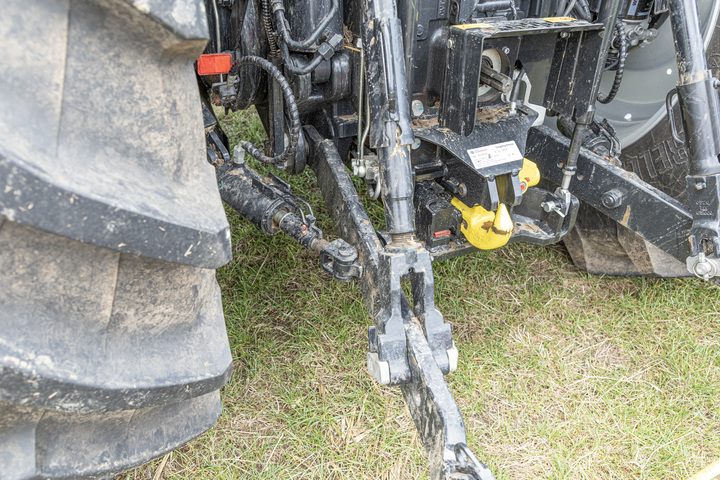
Stabilisers and sway blocks
Link arms need to be centralised, and with mounted ploughs, some side-to-side movement is required to help the plough pull centrally behind the tractor. "Try and eliminate sideways movement of link arms when using semi-mounted ploughs, as the pivot point is always behind the headstock," says Adam Burt.
Headstock and cross-shaft
Where link arm balls can float on cross-shaft pins, for example with Cat III balls, fit collars so the balls are held against the inside of the headstock. Without collars, the balls will be pulled in during ploughing and pushed out when lifting, creating pin damage - if one side jams, it can also impact on plough alignment.

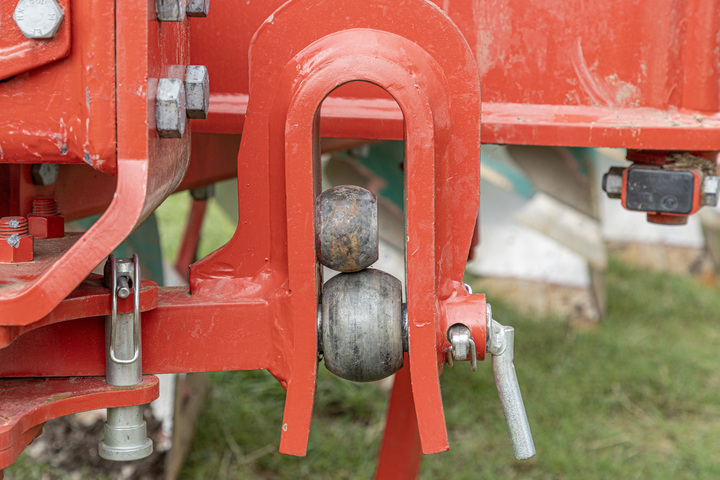
Top link fitting
Use the slotted hole, so the pin sits in the centre of the slot when ploughing. This affords contour following without impacting on the working depth. In very hard conditions, changing to the fixed hole can stop the plough riding out of the ground. "The fixed hole can also prevent the front of the plough being pulled out of the ground when using a press arm," he says.
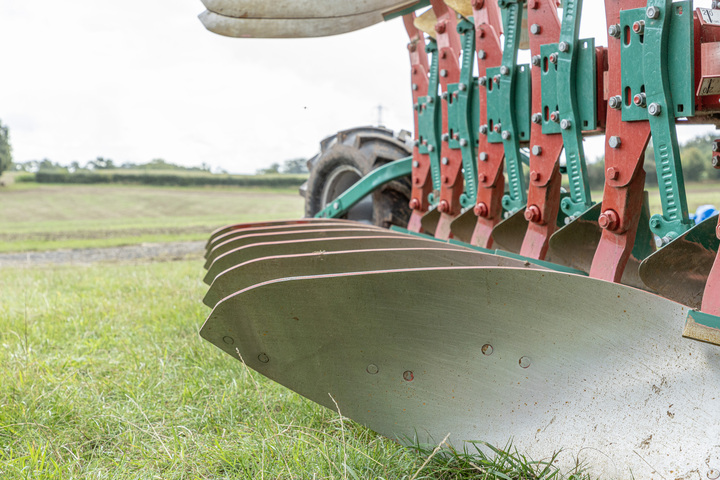
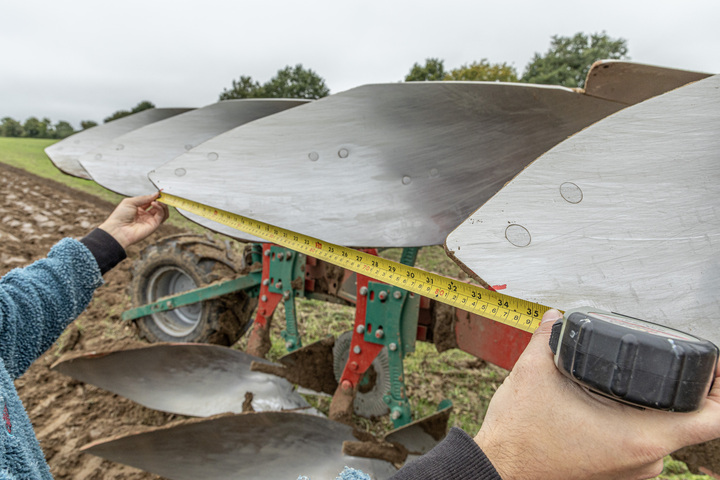
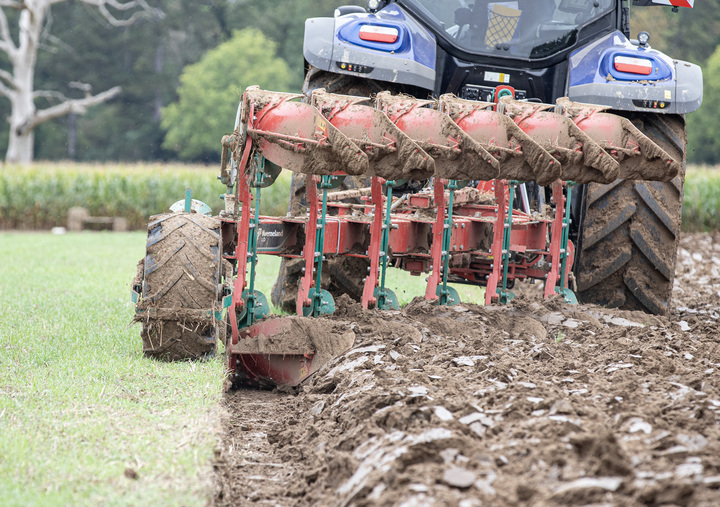
Plough alignment
For the plough to work efficiently, all bodies must be correctly aligned and parallel to one another. Incorrect settings will leave a poor finish and cause uneven wear. It is important to check furrow width between each body; underbeam clearance; interbody or point-to-point clearance, and mouldboard height. "One of the biggest issues with ploughs not matching up properly from left-to-right hand work and vice-versa, is often caused by incorrectly set mouldboards, usually when they have been replaced," says Adam.
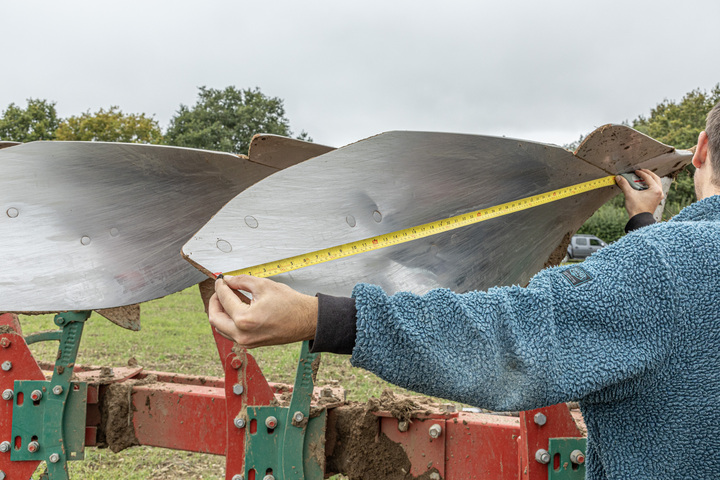
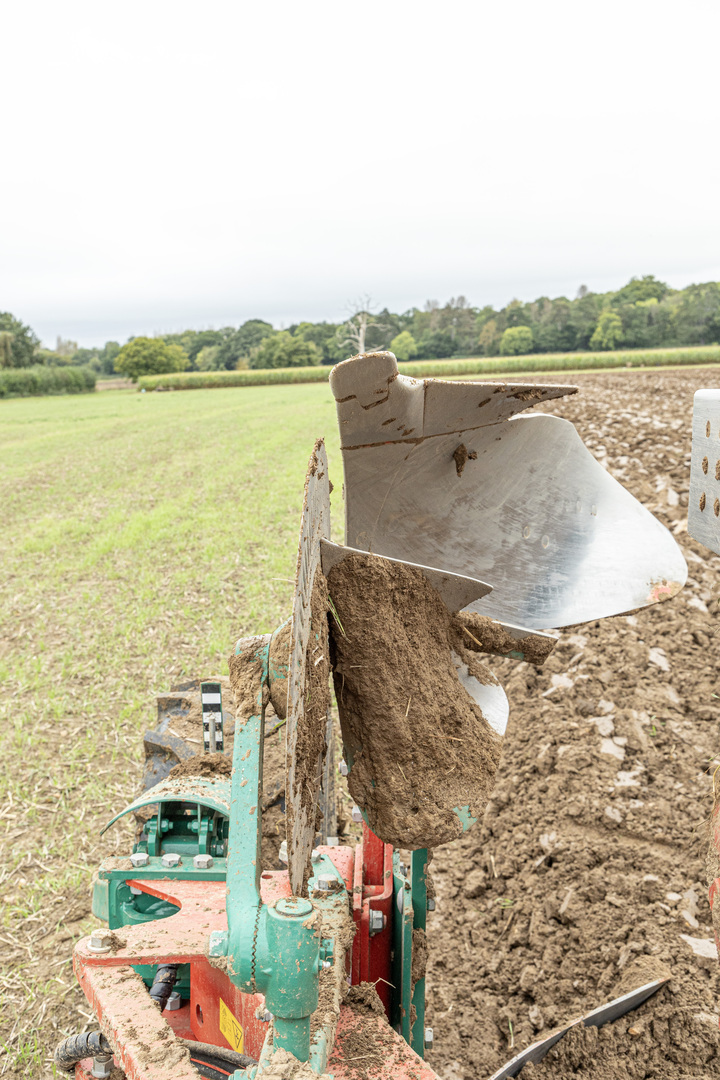
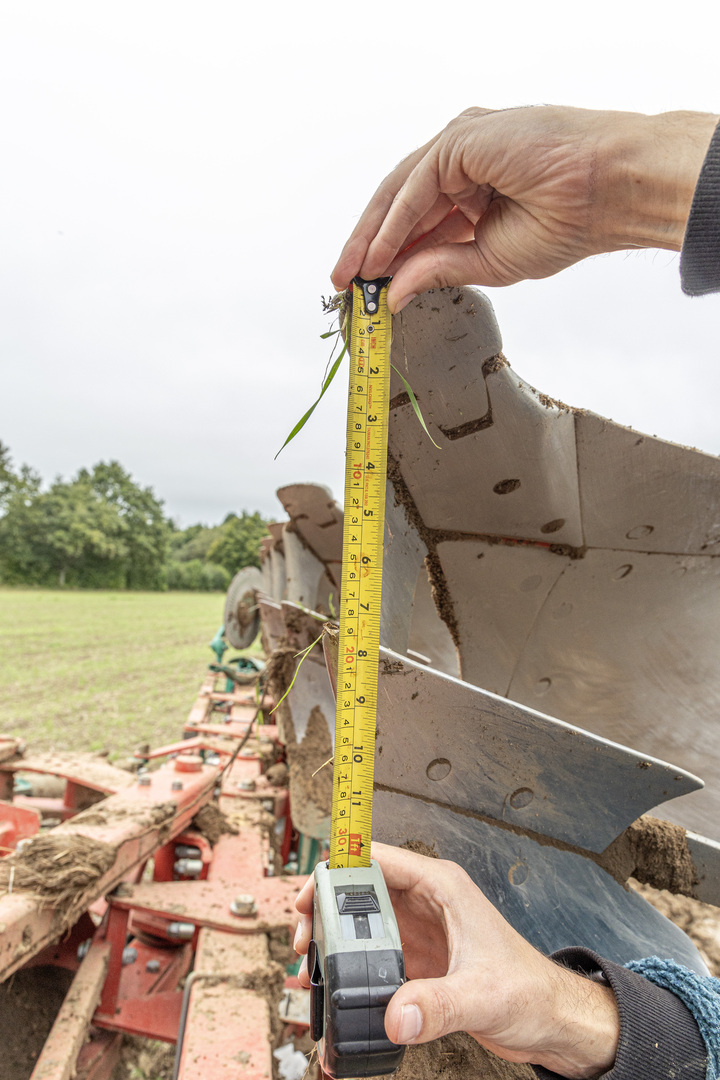
Mouldboard adjustment
Often know as triangulating the boards, this ensures the throw of the mouldboards is the same on all bodies, and is mirrored between left-hand and right-hand bodies. Chalk-mark a datum point on the end of every mouldboard, measuring from the same non-wearing point such as the intersection between share, shin and mouldboard.
Adjust the right-hand bodies first
Start with the centre body, and slacken the mouldboard stay so the board sits in a neutral position. Working from the middle body, measure forward and backward to each datum point on adjacent mouldboards using the plough's interbody clearance measurement. Adjust the stays so the mouldboard spacing is the same as the interbody clearance. If the interbody clearance is not known, take a measurement from any common point of the plough leg, to the datum point.
Adjust the left-hand bodies
To set the left-hand bodies to match the right hand, determine a measurement for the right-hand mouldboard throw. This is taken from the right-hand centre body's datum chalk mark, back to the leg on the body behind it. This distance should then be transferred to the left-hand centre mouldboard - adjust the stay to replicate the throw measurement. With the centre left-hand body now mirroring that of the right, set remaining mouldboard positions to match.
Rear furrow adjustment
If soil from the rear furrow will not stay up - and this can be soil type dependent - you can apply pressure to the soil by adjusting the mouldboard stays. This enables you to push the rear furrows forward, to help soil stay in place, rather than roll back into the open furrow.
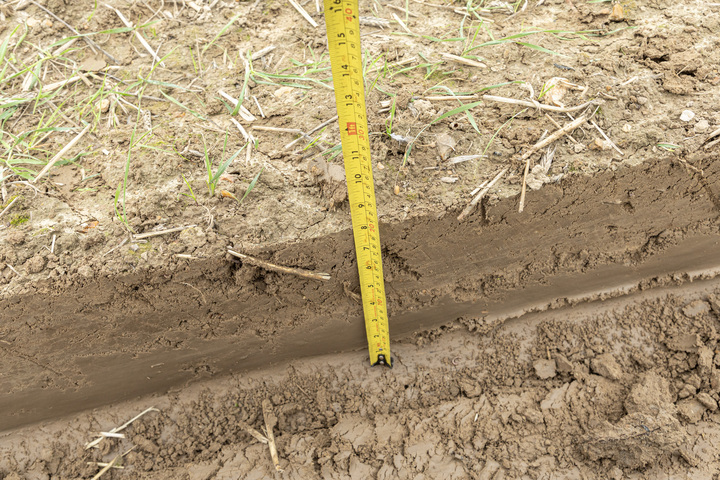
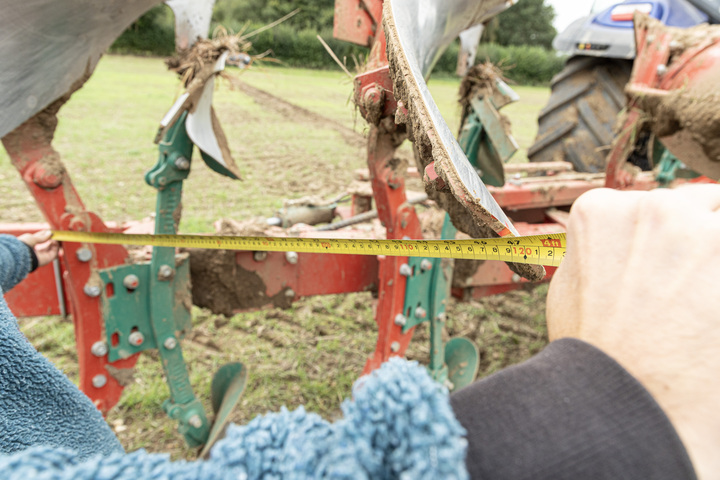
Working depth
Always set your ploughing depth at the land wheel before setting your tractor linkage. Ploughs that use a single depth wheel and two adjusters - on for left-hand and one for right-hand depth control - are trickier to set correctly than those using a single adjuster. Take the time to check the working depth of the rear furrow, in both directions, before making any necessary adjustments.
Beam levelling
With the ploughing depth correctly set, check that the beam sits parallel to the surface by adjusting the tractor's linkage. This is easier to determine with the help of an assistant, and best done with the top link disconnected.
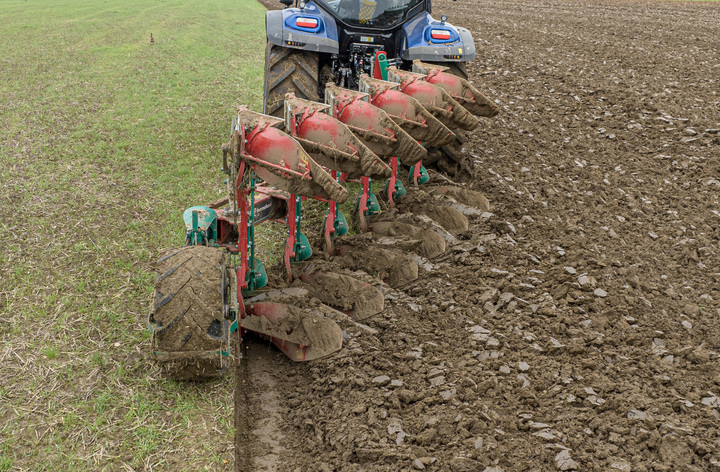
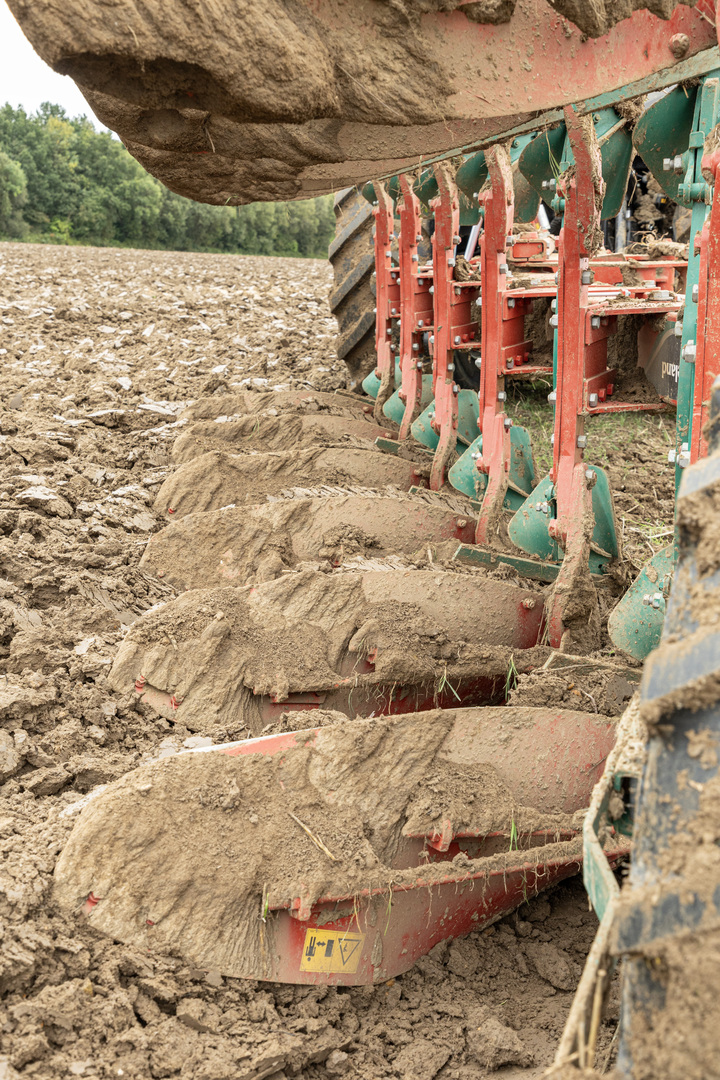
Check soil flow
With all bodies working at the correct depth, look at the soil flow from the back of the plough. There should be an equal amount flowing across the mouldboards, confirming that the depth of the front furrow, matches that of the rear furrow.
Vertical adjustment
Start with the plough sitting upright in the furrow, with the leg 90 degrees to the surface. A change in ploughing depth may require the wing stops to be adjusted to compensate for any change. Wing stops can be used to fine-tune the plough angle, often needed to roll soil uphill, when working across a bank.
Front furrow width
Measure the front furrow width and compare it to the furrow width of the plough. Use the front furrow width adjuster - this could be manual or hydraulic - to match the front furrow width to the rest of the plough. When correctly aligned, the top link and link arms should float centrally behind the tractor.
Disc coulter
Disc coulters should be set in a vertical position, and at 10-20mm wider than the furrow width. Working depth should be between 40-100mm. In lighter soils, it may be advantageous to move the disc further away from the mouldboard, to leave a clean furrow wall.
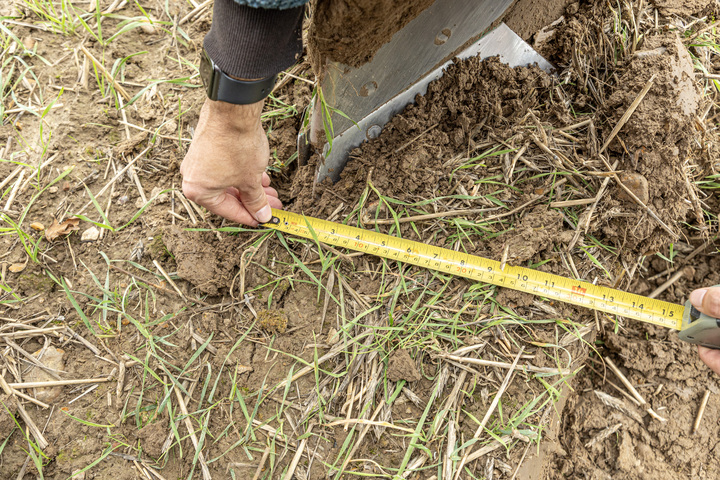
Skimmer set-up
Set your initial skimmer depth by measuring from the plough point. These are not bodies, so should be working at around 20-50mm deep. Subtract this from your ploughing depth, to provide an initial skimmer depth setting that can be applied to all skimmers. When used in combination with discs, set them as close to the disc as possible.

Skimmer tuning
Skimmers that work immediately behind the tractor wheels may need to be set deeper than the others. This is to ensure any surface damage from cleat marks, can be efficiently skimmed off - if skimmers are working too shallow, trash is unlikely to be properly buried.